手册 v0.1.0 · KaiderBooks v2.0.0 · 2026-07-20
Banking and reconciliation
In one sentence
Link each bank account to a ledger account, upload the statement file your bank gives you so it becomes individual transactions, then pair every transaction with the matching journal line — once paired, you know the books agree with the bank.
1. Why reconcile
The cash figure in your books comes from the journals you post; the bank's figure comes from the bank. In theory they agree. In practice:
| Typical difference | What it means |
|---|---|
| In the books, not at the bank | A cheque was issued but has not been presented |
| At the bank, not in the books | Bank charges, interest, direct debits you have not recorded yet |
| Present on both sides but not equal | An amount was keyed wrong, or posted to a different account |
Reconciliation pairs the two sides item by item; whatever cannot be paired is a difference to deal with. Finish reconciliation before closing the month — otherwise the cash figure on the reports cannot be trusted.
2. Create the bank account first
Go to Books → Banking → Accounts & Feeds and click New Bank Account.
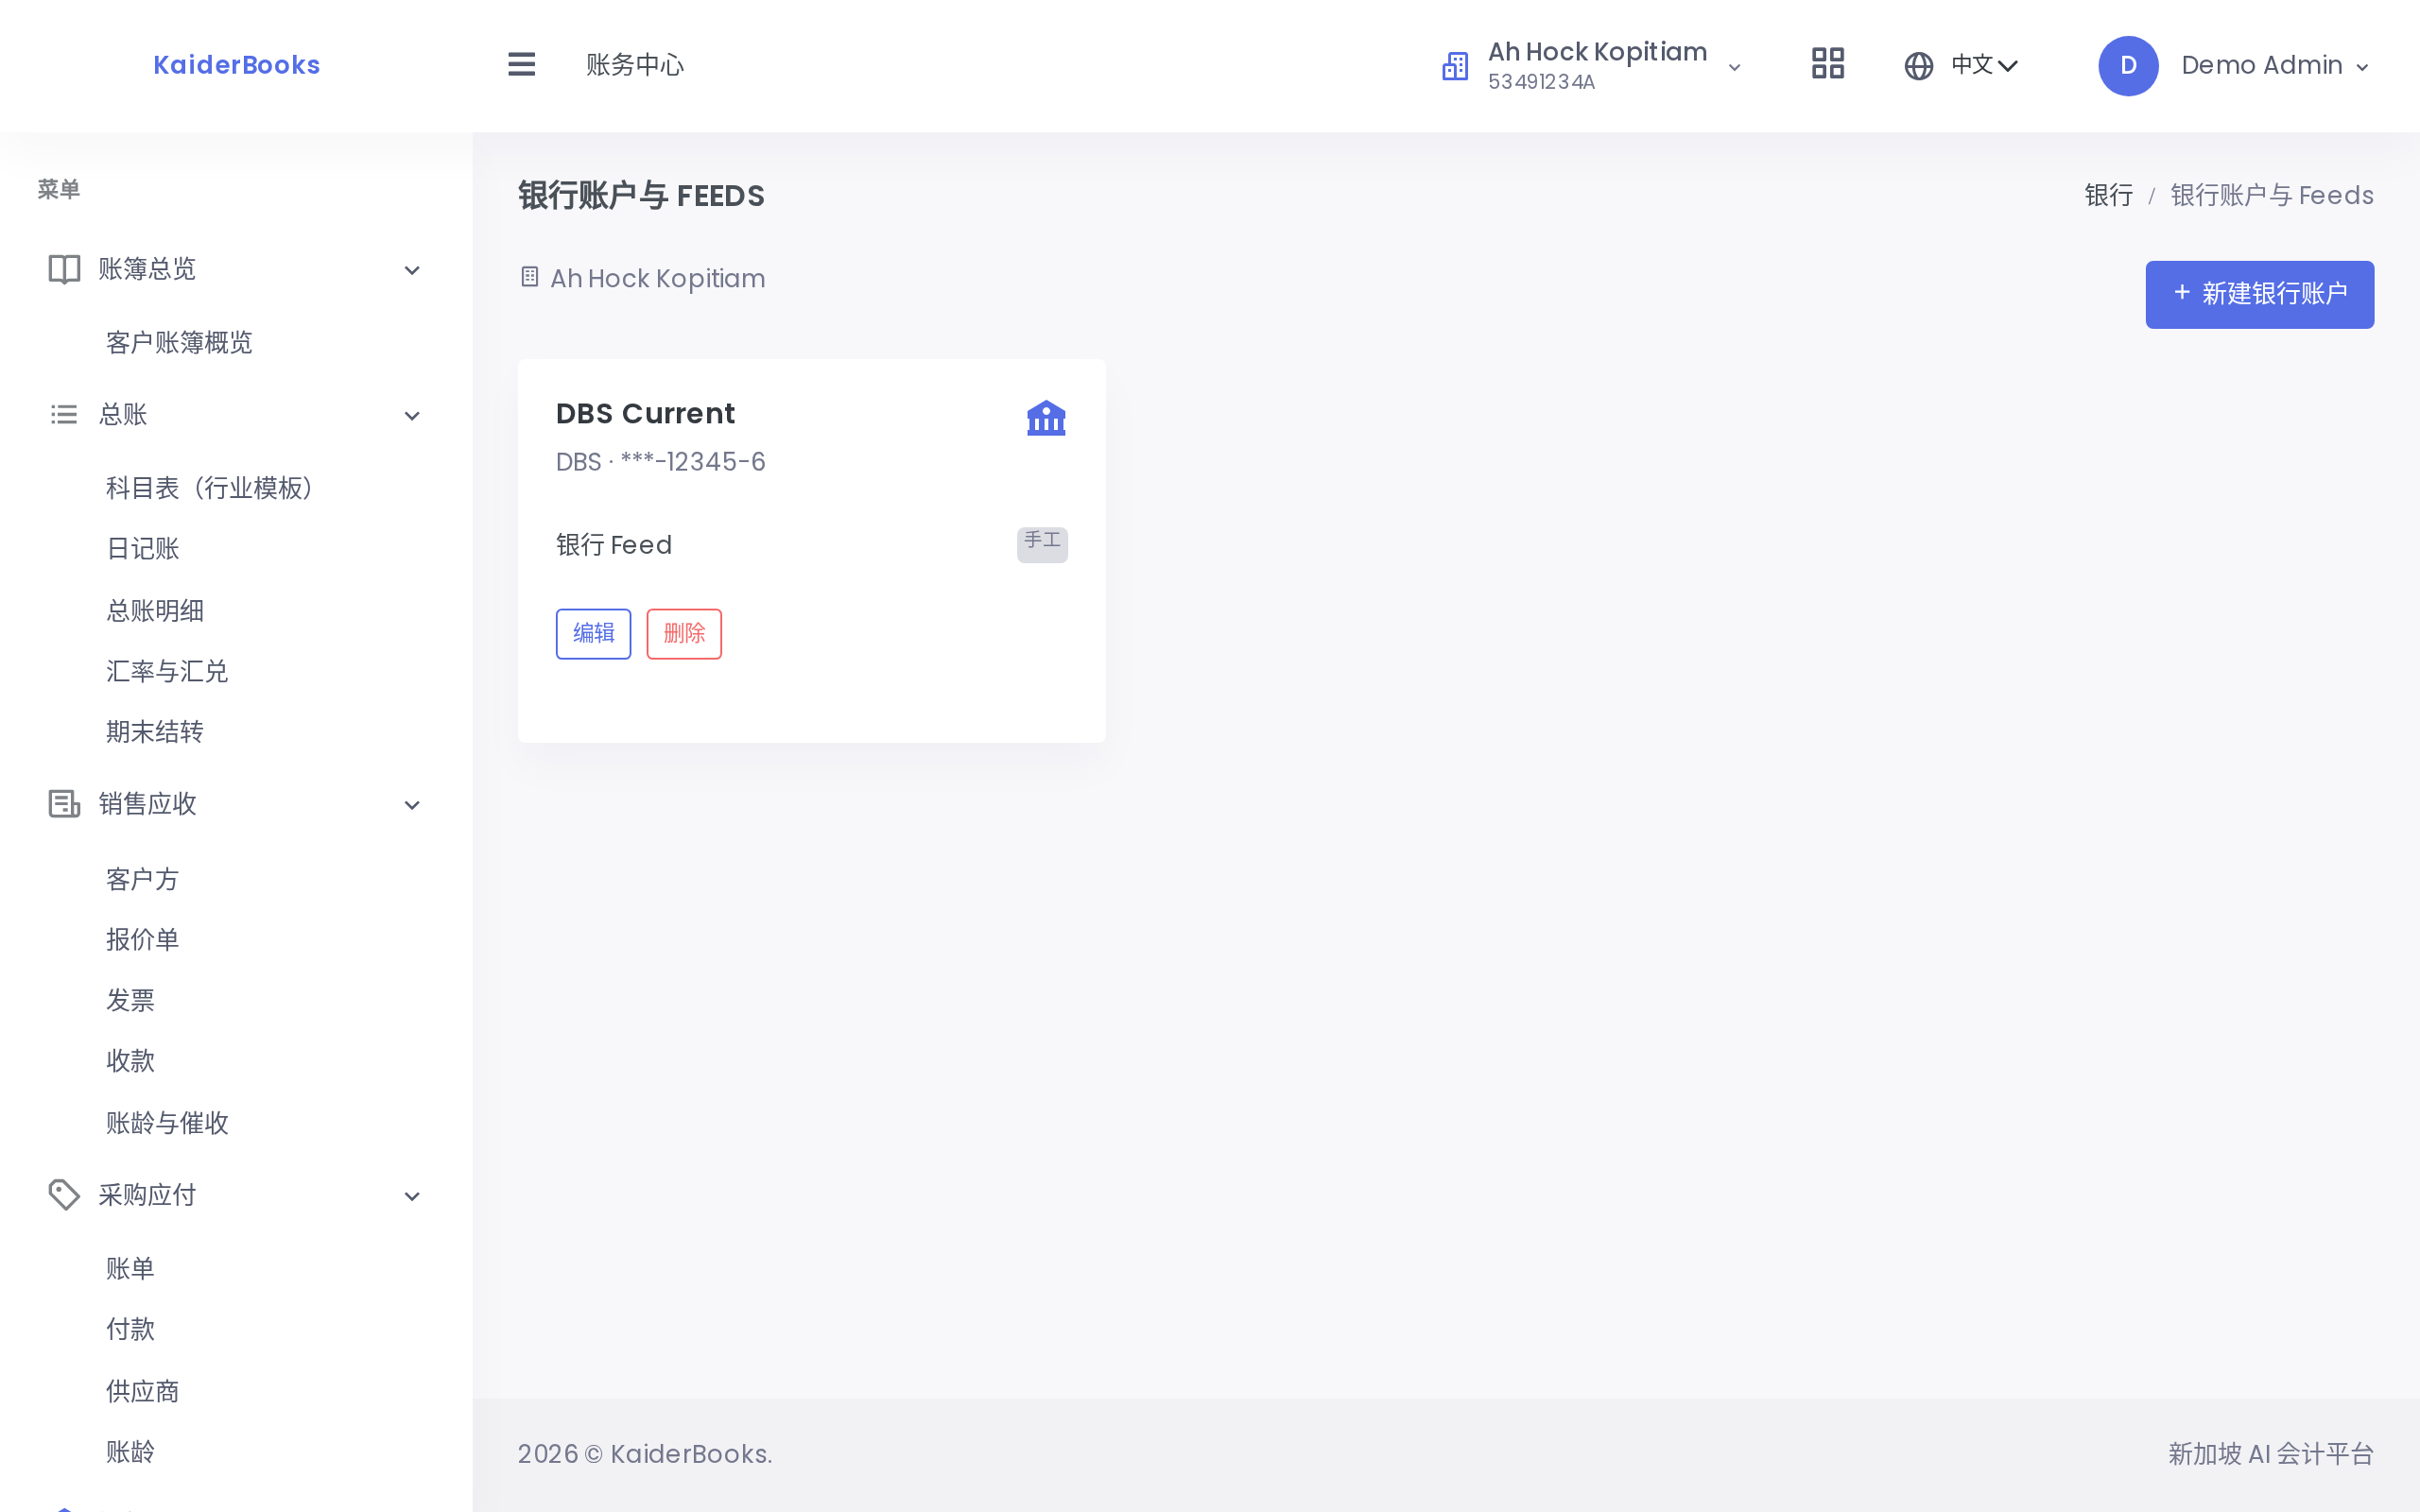
| Field | Required | Notes |
|---|---|---|
| Account name | ✅ | For your own reference, e.g. "DBS operating account" |
| Bank | ✅ | DBS / OCBC / UOB / Other |
| Masked account no. | ✅ | The last few digits are enough, e.g. **** 1234; the full number need not be stored |
| GL asset account | ✅ | Which ledger account this bank account maps to — the dropdown lists asset accounts only |
Currency and feed status are not on the form
Currency is fixed at SGD and feed status defaults to Manual, so neither appears in the form — transactions arrive by file import today, not through a bank API.
The GL asset account decides what the right-hand column shows during reconciliation: the "Book entries" panel is drawn from cash journal lines on that account. Map it to the wrong account and the panel comes up empty.
A client can hold several bank accounts, each mapped to its own ledger account (1010 operating, 1020 savings, and so on).
3. Importing transactions
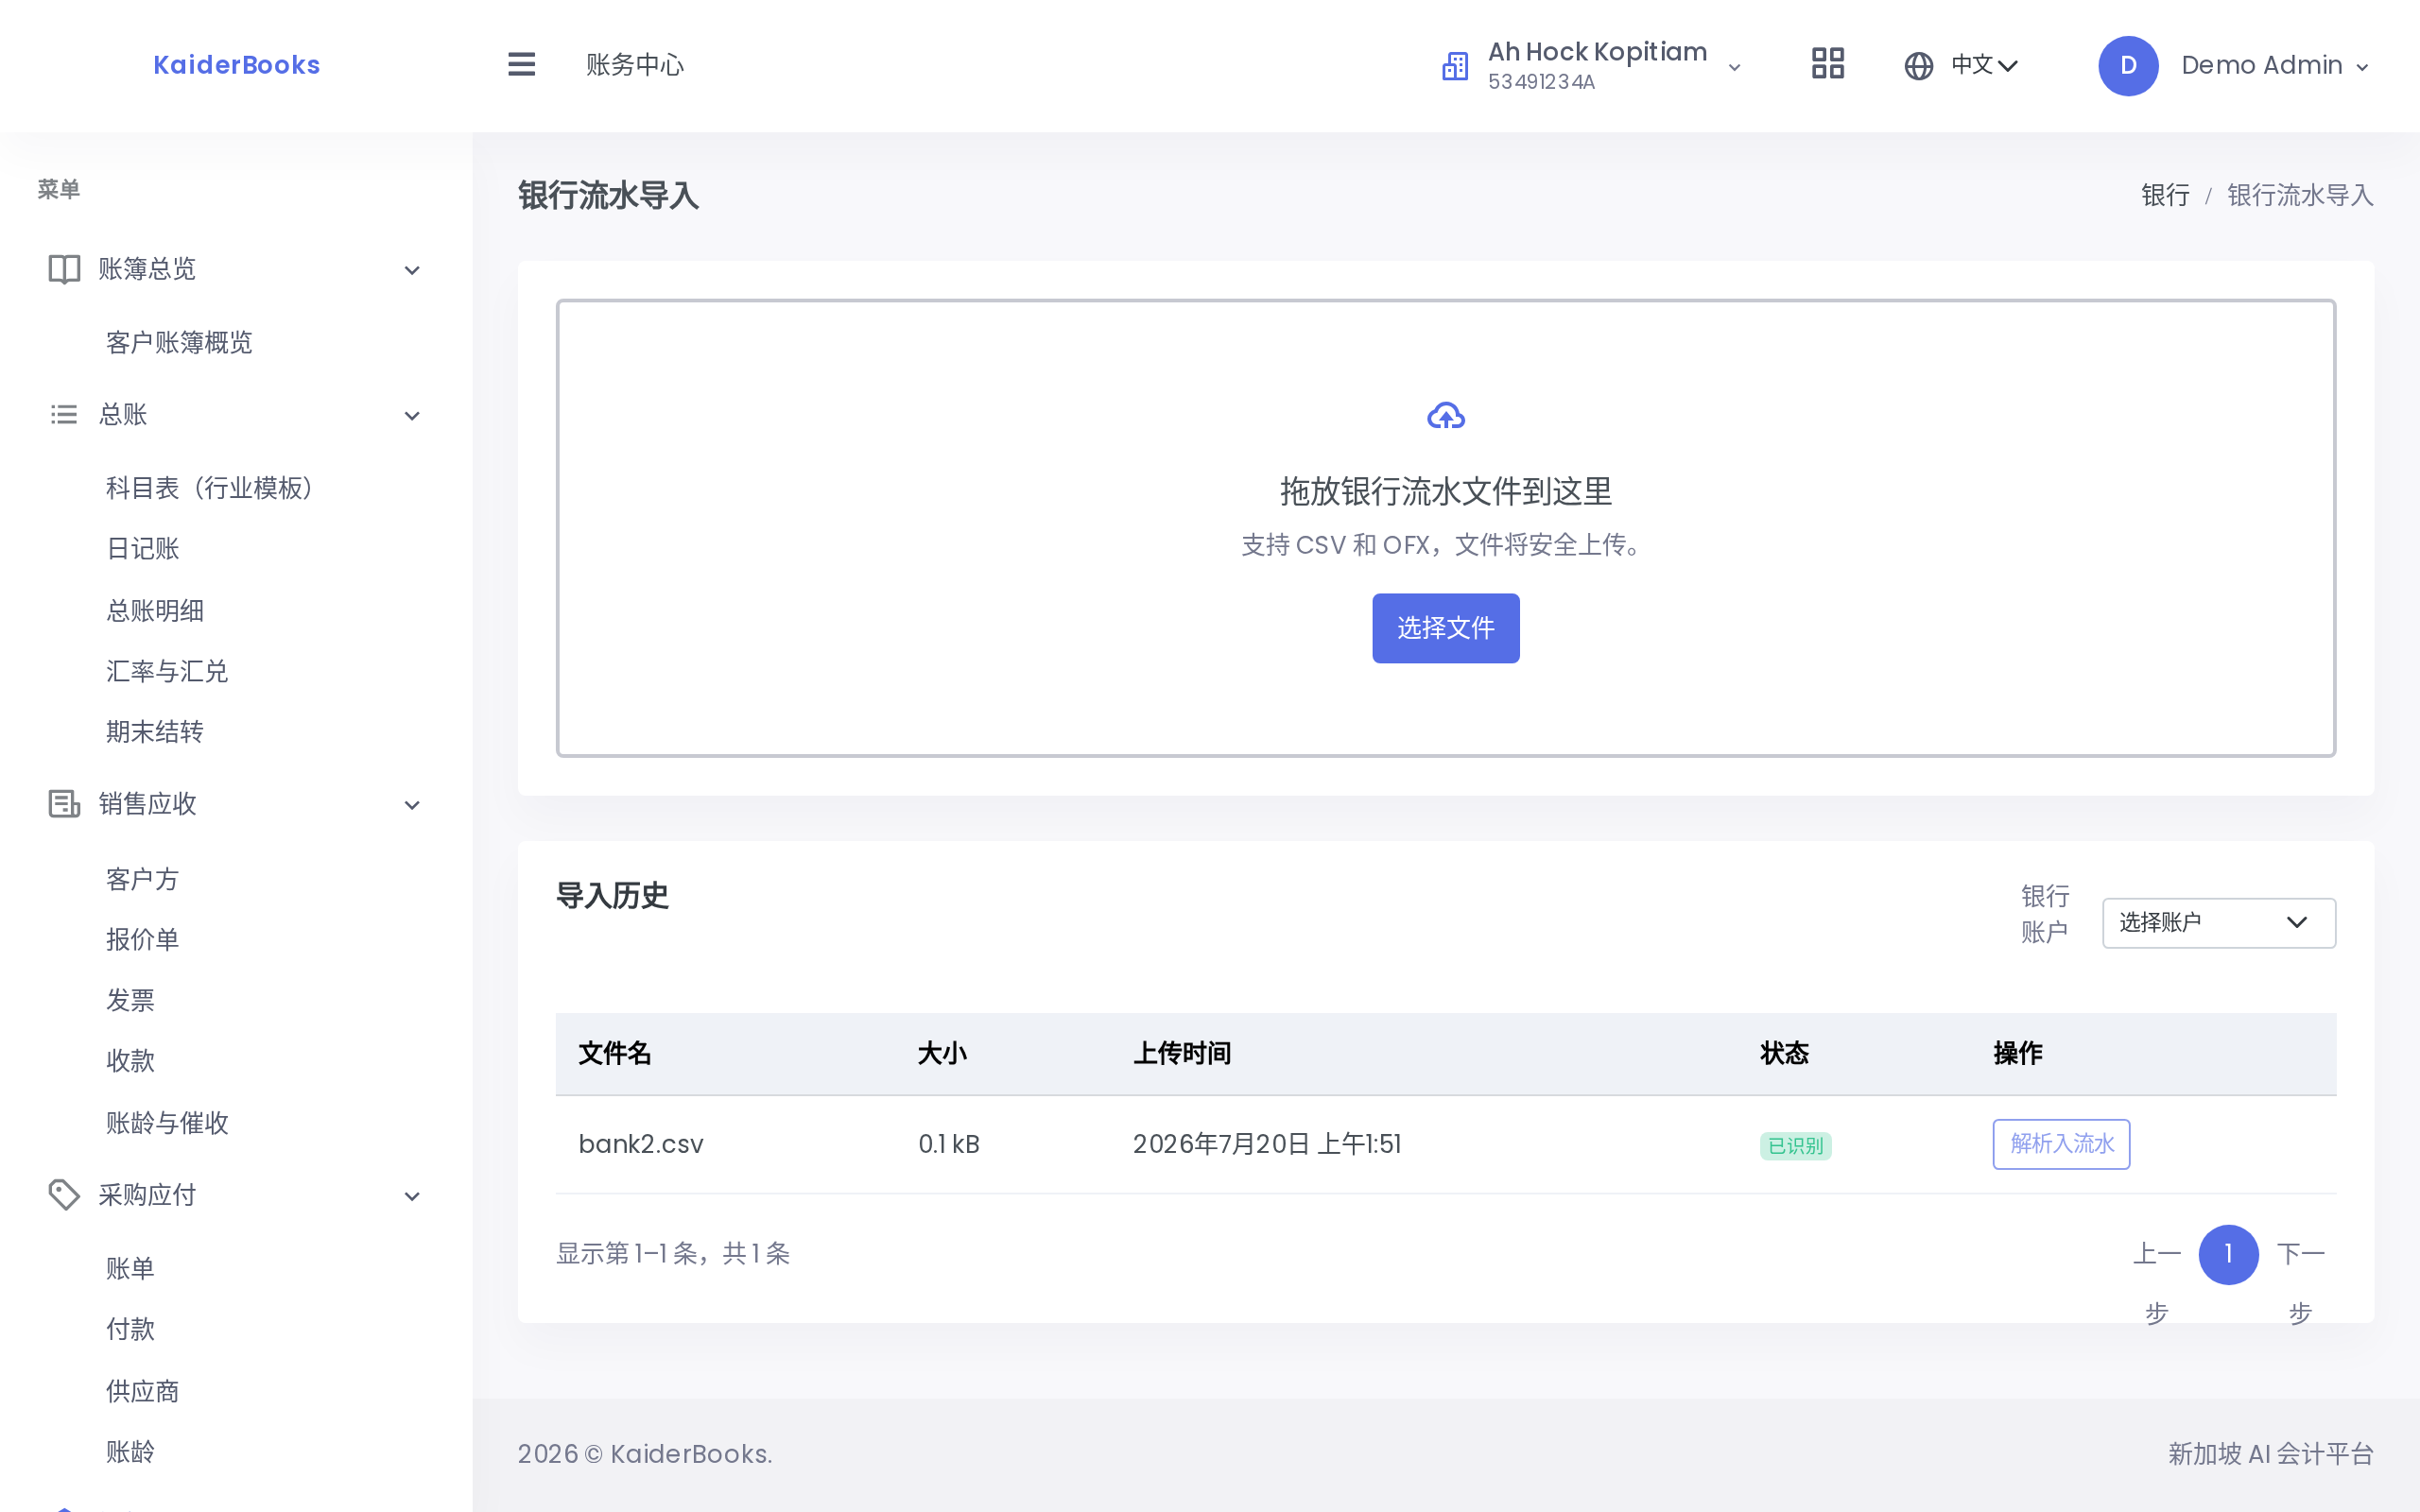
Go to Books → Banking → Statement Import. There are two steps, and the second one catches most people out the first time.
1
Pick the bank account first, or the parse button stays disabled
Step one: upload the file
Drag the statement file you downloaded from internet banking into the dashed area, or click Browse Files.
.csvand.ofxare accepted- Several files can be selected at once
- On completion you see "Uploaded N file(s)" and the files appear in the import history table below
This uploads a file — it is not a paste box
There is no field for pasting CSV text. Download the statement file from your bank and upload it.
Step two: pick the bank account, then parse
Uploading only stores the file; it is not yet a set of transactions. In the import history area, select the bank account in the top right, then click Parse into transactions on the file's row.
Without a bank account selected, the button is disabled
The system has to know which account the statement belongs to before it can file the transactions correctly.
Parsing reports something like "Imported 12 transaction(s); skipped 2 row(s)":
- Imported — rows successfully read as transactions
- Skipped — headers, blank lines, and rows in a format it could not read
Every parsed transaction starts as Unmatched; the reconciliation page is where you work through them.
4. Reconciling
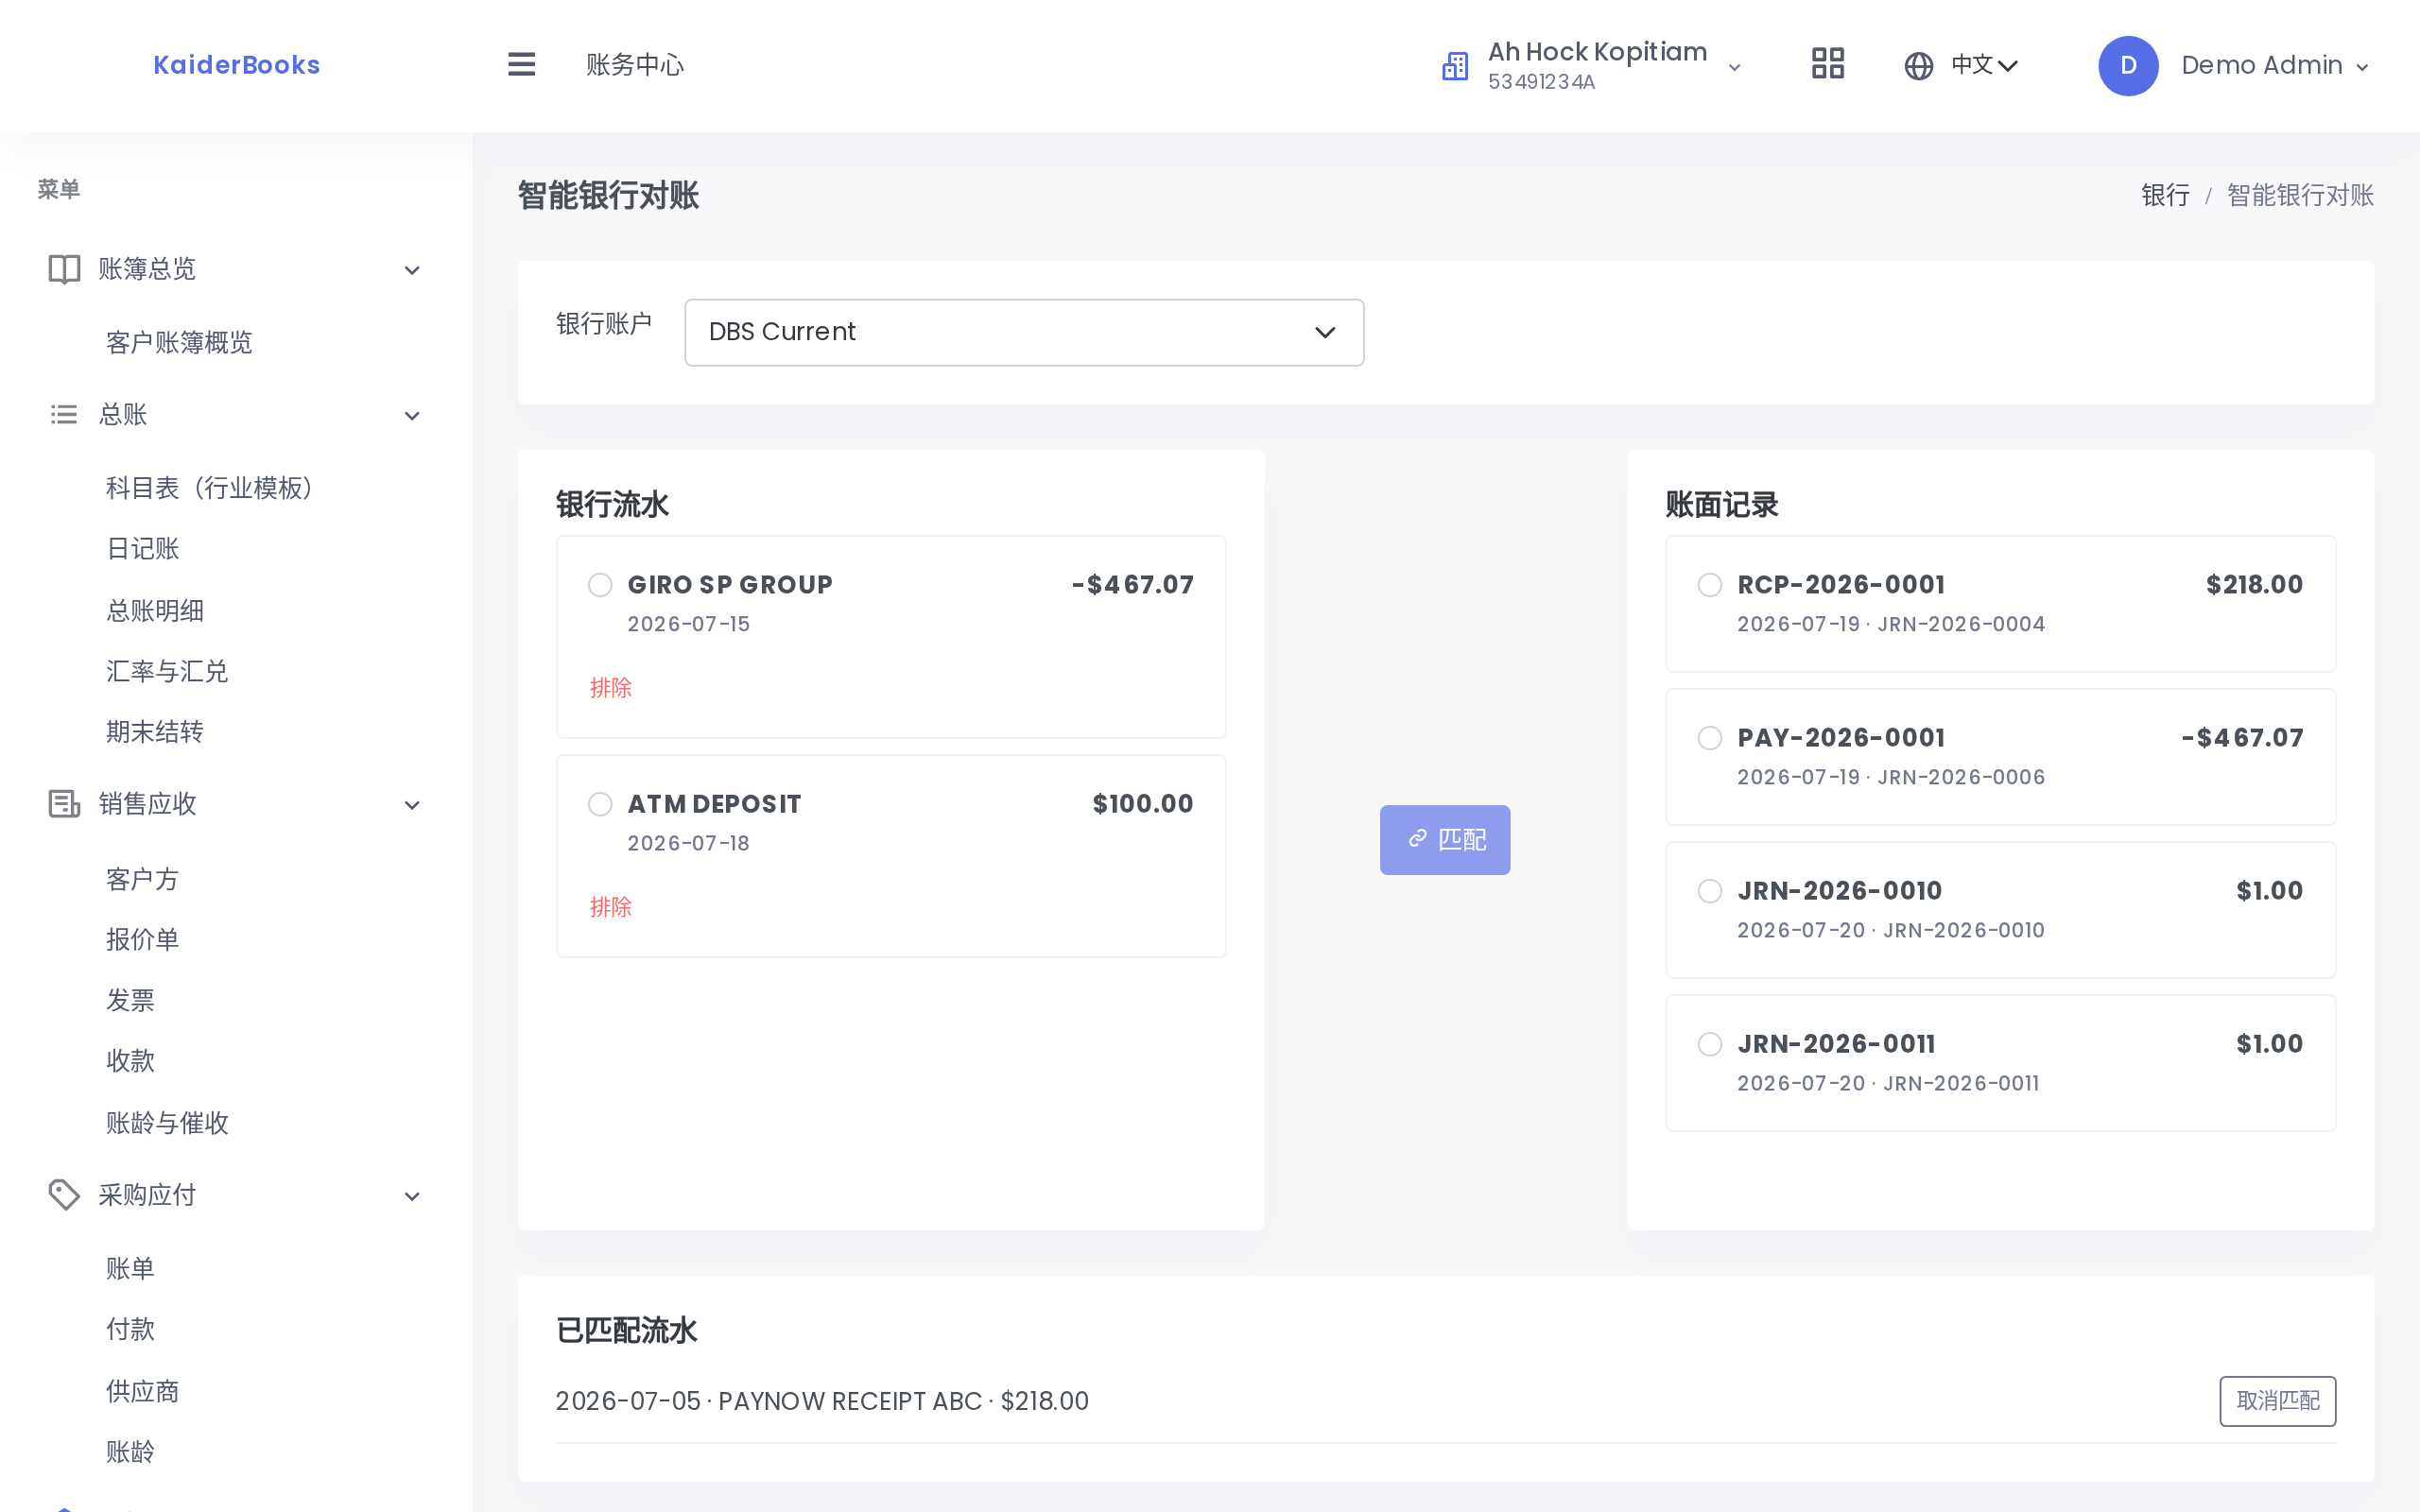
Go to Books → Banking → Smart Reconciliation and choose the bank account at the top. The page has three columns:
1
Choose the bank account you are reconciling
| Column | Contents |
|---|---|
| Left — Bank transactions | Every Unmatched transaction on this account, each with a radio button |
| Middle | The Match button |
| Right — Book entries | Cash journal lines on the ledger account this bank account maps to, also single-select |
How to pair
- Select a bank transaction on the left
- Select the corresponding book entry on the right (check amount, date and description)
- Click Match in the middle
Match stays disabled until both sides are selected
Matching pairs exactly one transaction with one journal line, so both sides must be specified.
Once matched, the transaction leaves the left column and appears under Matched transactions below.
The three statuses
| Status | Meaning | How it gets there |
|---|---|---|
| Unmatched | Freshly imported, not yet paired | Initial state after parsing |
| Matched | Paired with a journal line | Click Match |
| Excluded | Deliberately marked as out of scope | Click Exclude |
Where Exclude fits: bank charges, interest and similar sundries you have not recorded yet, or rows that were imported twice. An excluded row leaves the pending list and the page shows "N excluded transaction(s)".
Every action is reversible
Each row under Matched transactions carries an Unmatch button that returns it to Unmatched so you can pair it again. Match, unmatch and exclude all take effect immediately with no confirmation dialog — but all are reversible, so there is nothing to be nervous about.
5. When something will not reconcile
| Situation | What to do |
|---|---|
| At the bank, not in the books (charges, interest) | Enter a manual journal for it, then come back and match — or simply exclude it |
| In the books, not at the bank (unpresented cheque) | Leave it; pair it when next month's statement arrives |
| Amounts differ slightly | Usually the original journal was keyed wrong. Posted journals cannot be edited — reverse it and enter a correct one |
| The same line imported twice | Exclude the duplicate |
The finish line is unglamorous: the left column is empty, or whatever remains is a reconciling item you can explain.