手册 v0.1.0 · KaiderBooks v2.0.0 · 2026-07-20
Users, role permissions and developer tools
In one sentence
Who gets into the system and what they can do once inside is decided in the Admin subsystem — along with the API keys, webhooks and audit log used for integrations and for tracing what happened after the fact.
1. Inviting a user
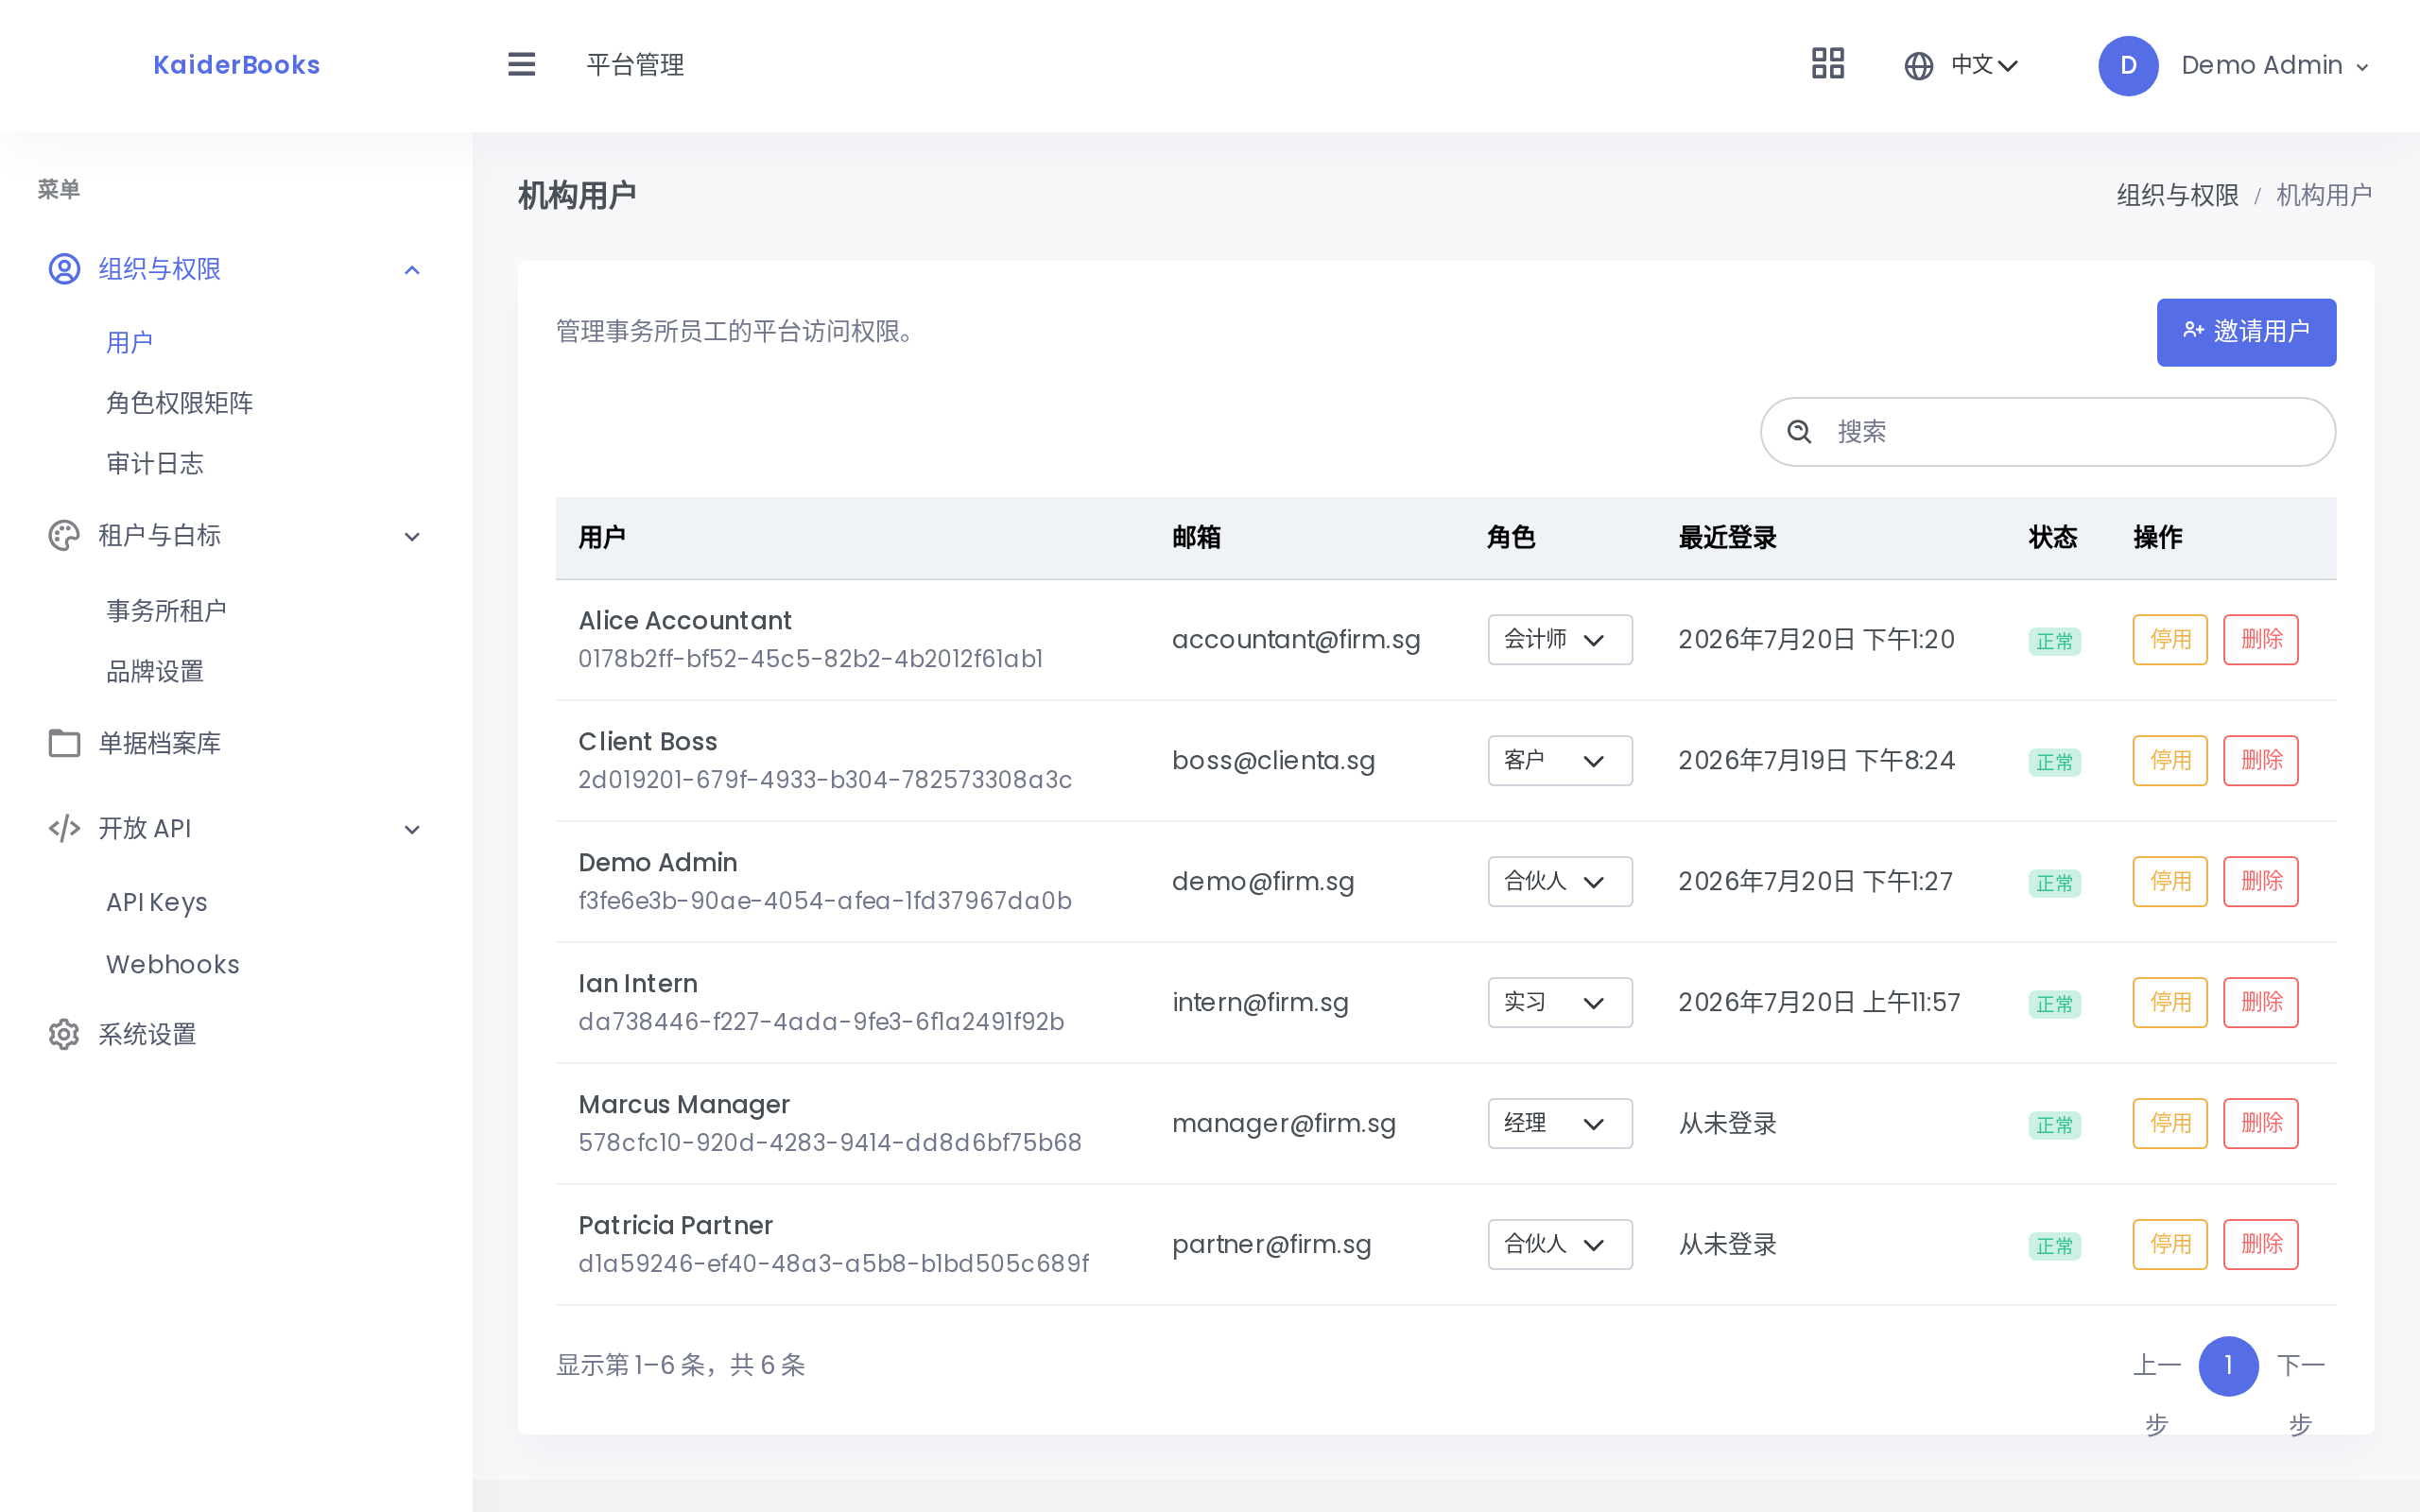
Click Invite user and fill in three things:
| Field | Notes |
|---|---|
| Name | Appears in the member list, as a task assignee, and on timesheets |
| This is the login | |
| Role | Partner / Manager / Accountant / Intern / Client |
Choosing the Client role adds a second dropdown where you must name the client company — a client account only ever sees its own company's data.
The initial password is shown once
After submitting, the dialog displays an initial password with a copy button beside it. Close that dialog and it is gone for good — the system never stores it in plain text.
If nobody wrote it down, there is a way back: delete the user and invite the same email again. A fresh initial password is issued and the account's history is not lost.
What you can do straight from the list
| Action | Notes |
|---|---|
| Change role | A dropdown on each row; the change applies immediately |
| Enable / Disable | A disabled account cannot sign in, but all its history remains |
| Delete | Asks for confirmation. The same email can be invited again afterwards |
Disable or delete?
Someone on leave or moving teams — disable. Only delete when they are definitely not coming back. Neither affects the work they did: the actor recorded on every journal is kept permanently.
2. The role permission matrix
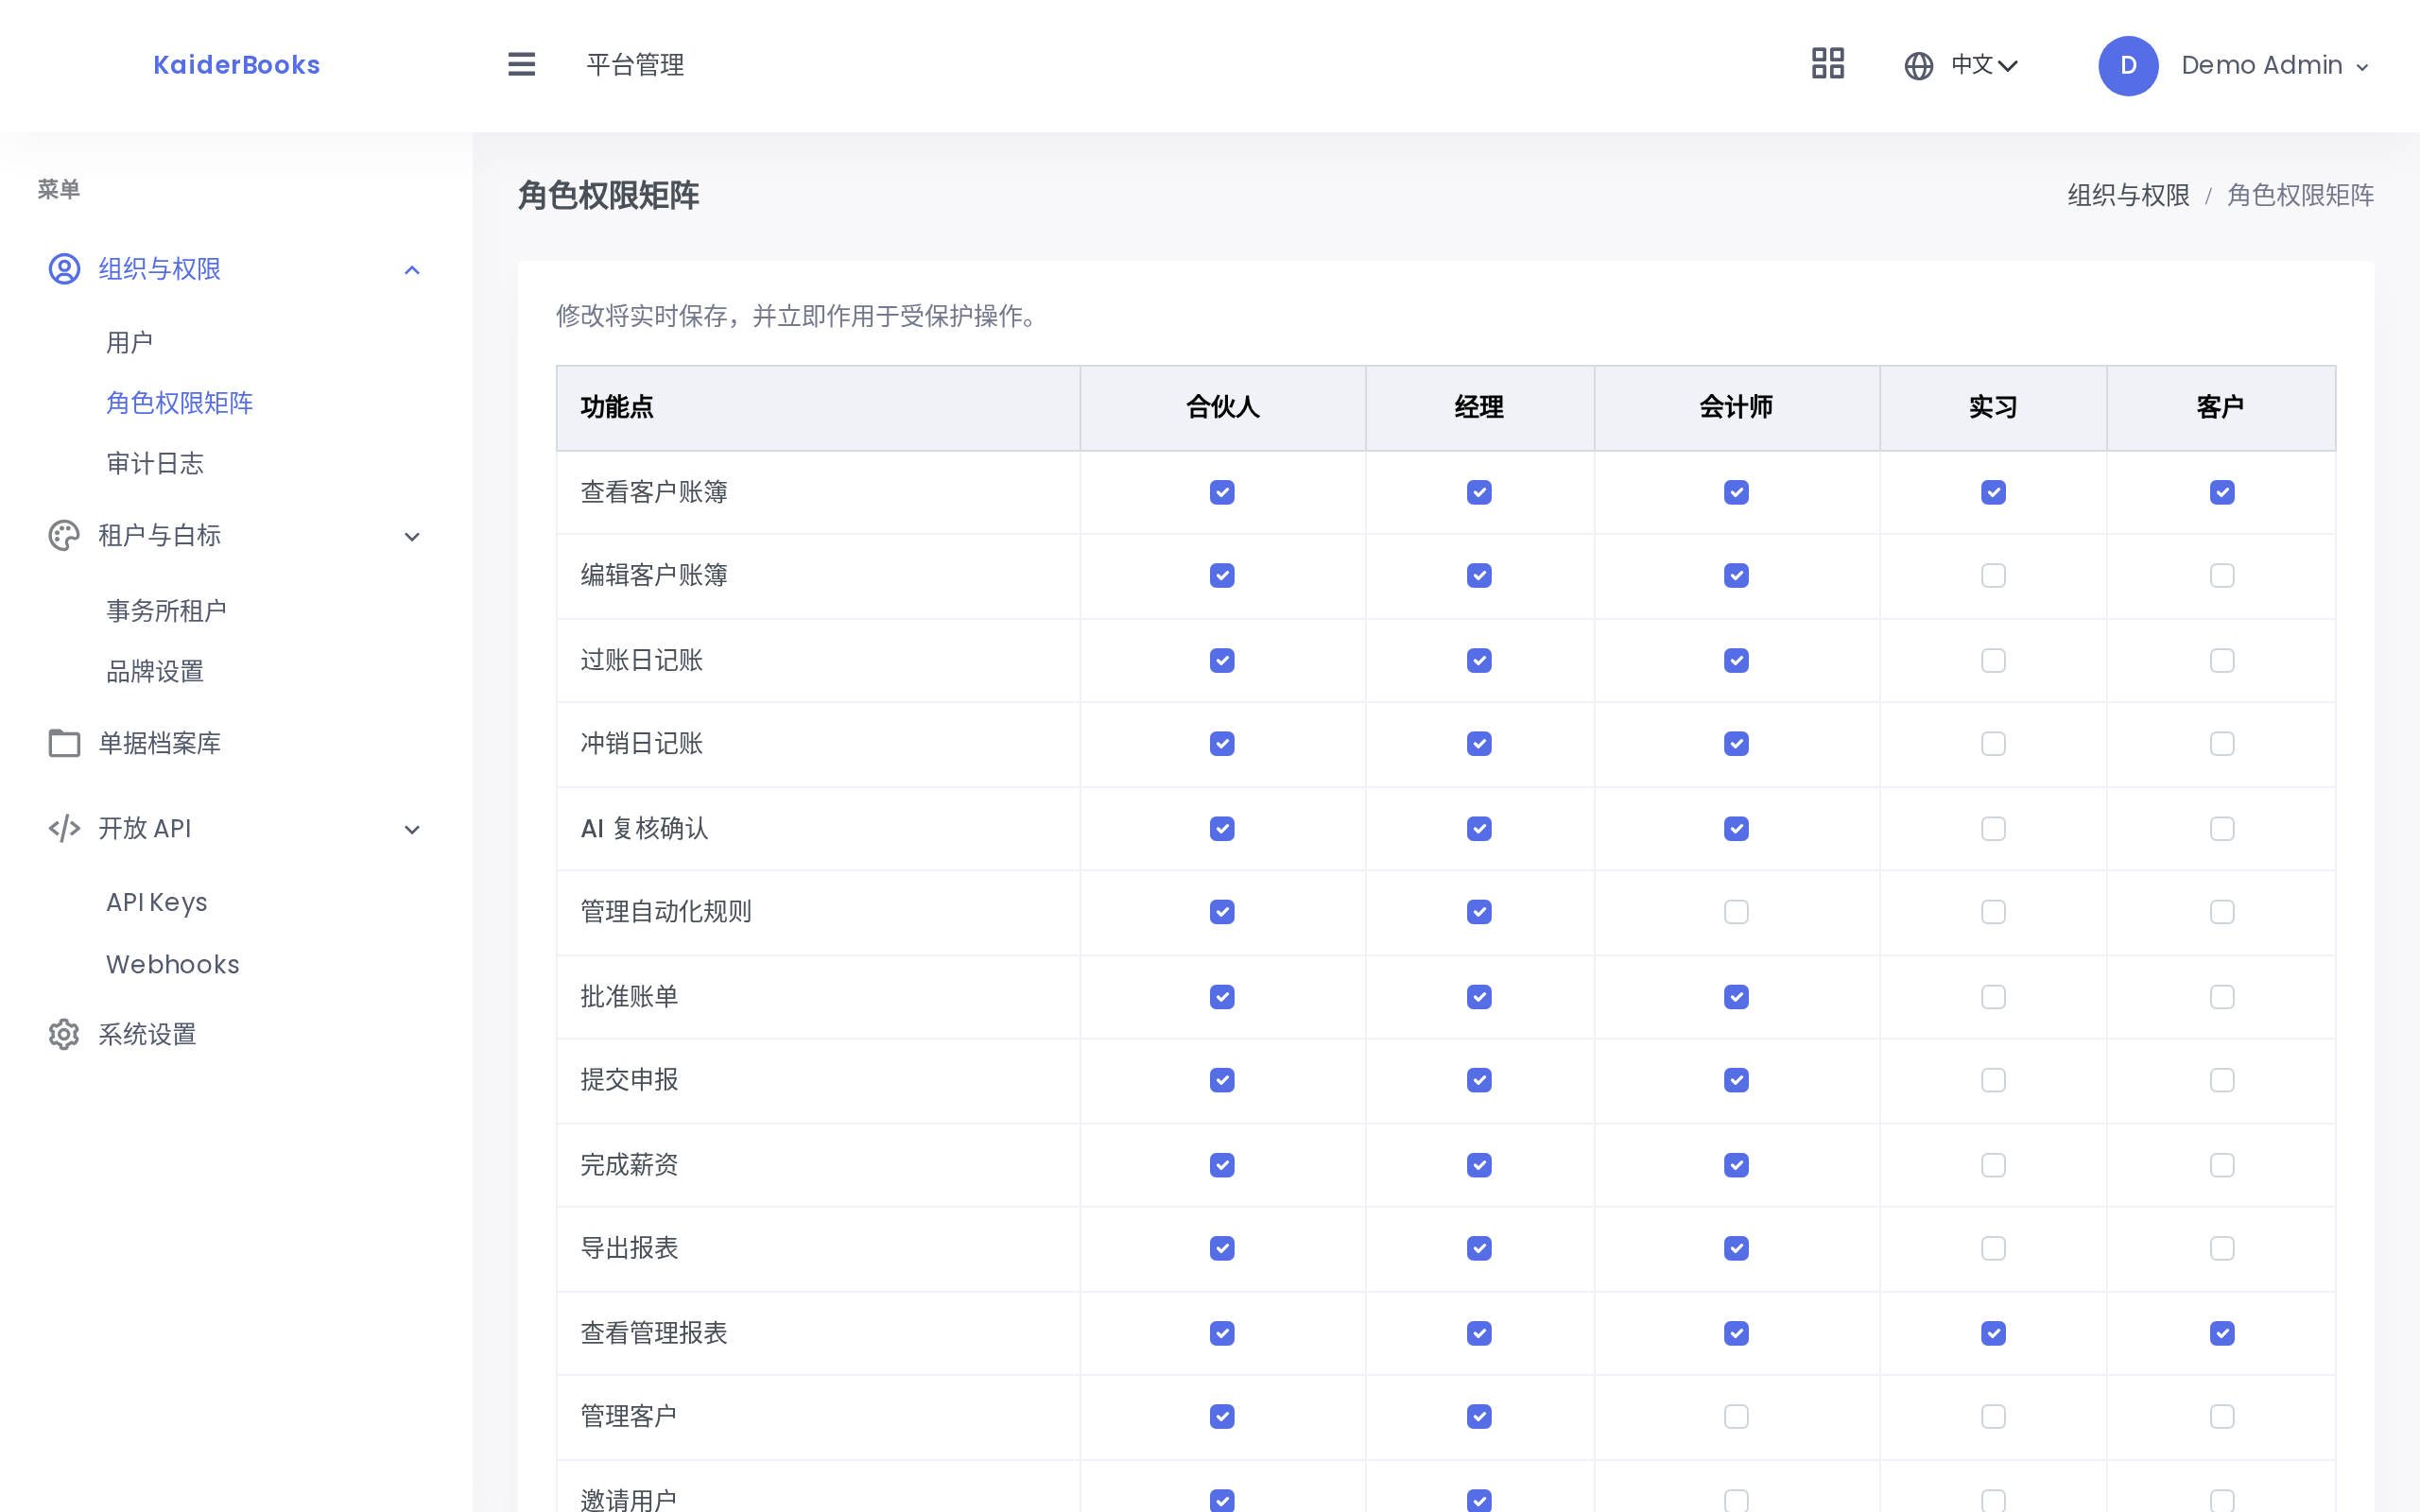
1
Ticking saves immediately — there is no save button
This is a grid of 21 capabilities × 5 roles: roles across the top, capabilities down the side, a tick meaning that role may do that thing.
Ticking saves immediately — there is no save button. A green "Permission matrix saved and in effect" appears above the grid.
The 21 capabilities fall into four groups:
| Group | Capabilities |
|---|---|
| Ledger | View client books, edit client books, post journals, reverse journals, send invoices, create payments, approve bills, lock periods |
| AI & automation | Confirm AI review, manage automation rules |
| Filing & reporting | Submit filings, complete payroll, export reports, view management reports |
| Administration | Manage clients, invite users, manage role permissions, manage API keys, manage webhooks, view audit log, update firm settings |
Important: permissions work in two layers
This is the part most often misread: the matrix is not the only gate. It narrows down within what a role is already allowed to do.
A request passes a coarse role gate first, and only then the matrix:
Request → Role gate (may this role touch this kind of operation?) → Matrix (is the capability ticked?) → AllowedTake a real example. Posting is open at the role gate to partners, managers and accountants only. So:
- Tick "post journals" for an accountant → the accountant can post ✅
- Untick it for the accountant → the accountant cannot post ✅ (the matrix bites)
- Tick "post journals" for an intern → the intern still cannot post ⚠️ (stopped at the role gate)
The matrix therefore restricts; it does not grant. To give someone a capability their role does not have, ticking a box will not do it — change their role.
3. Developer tools
API keys
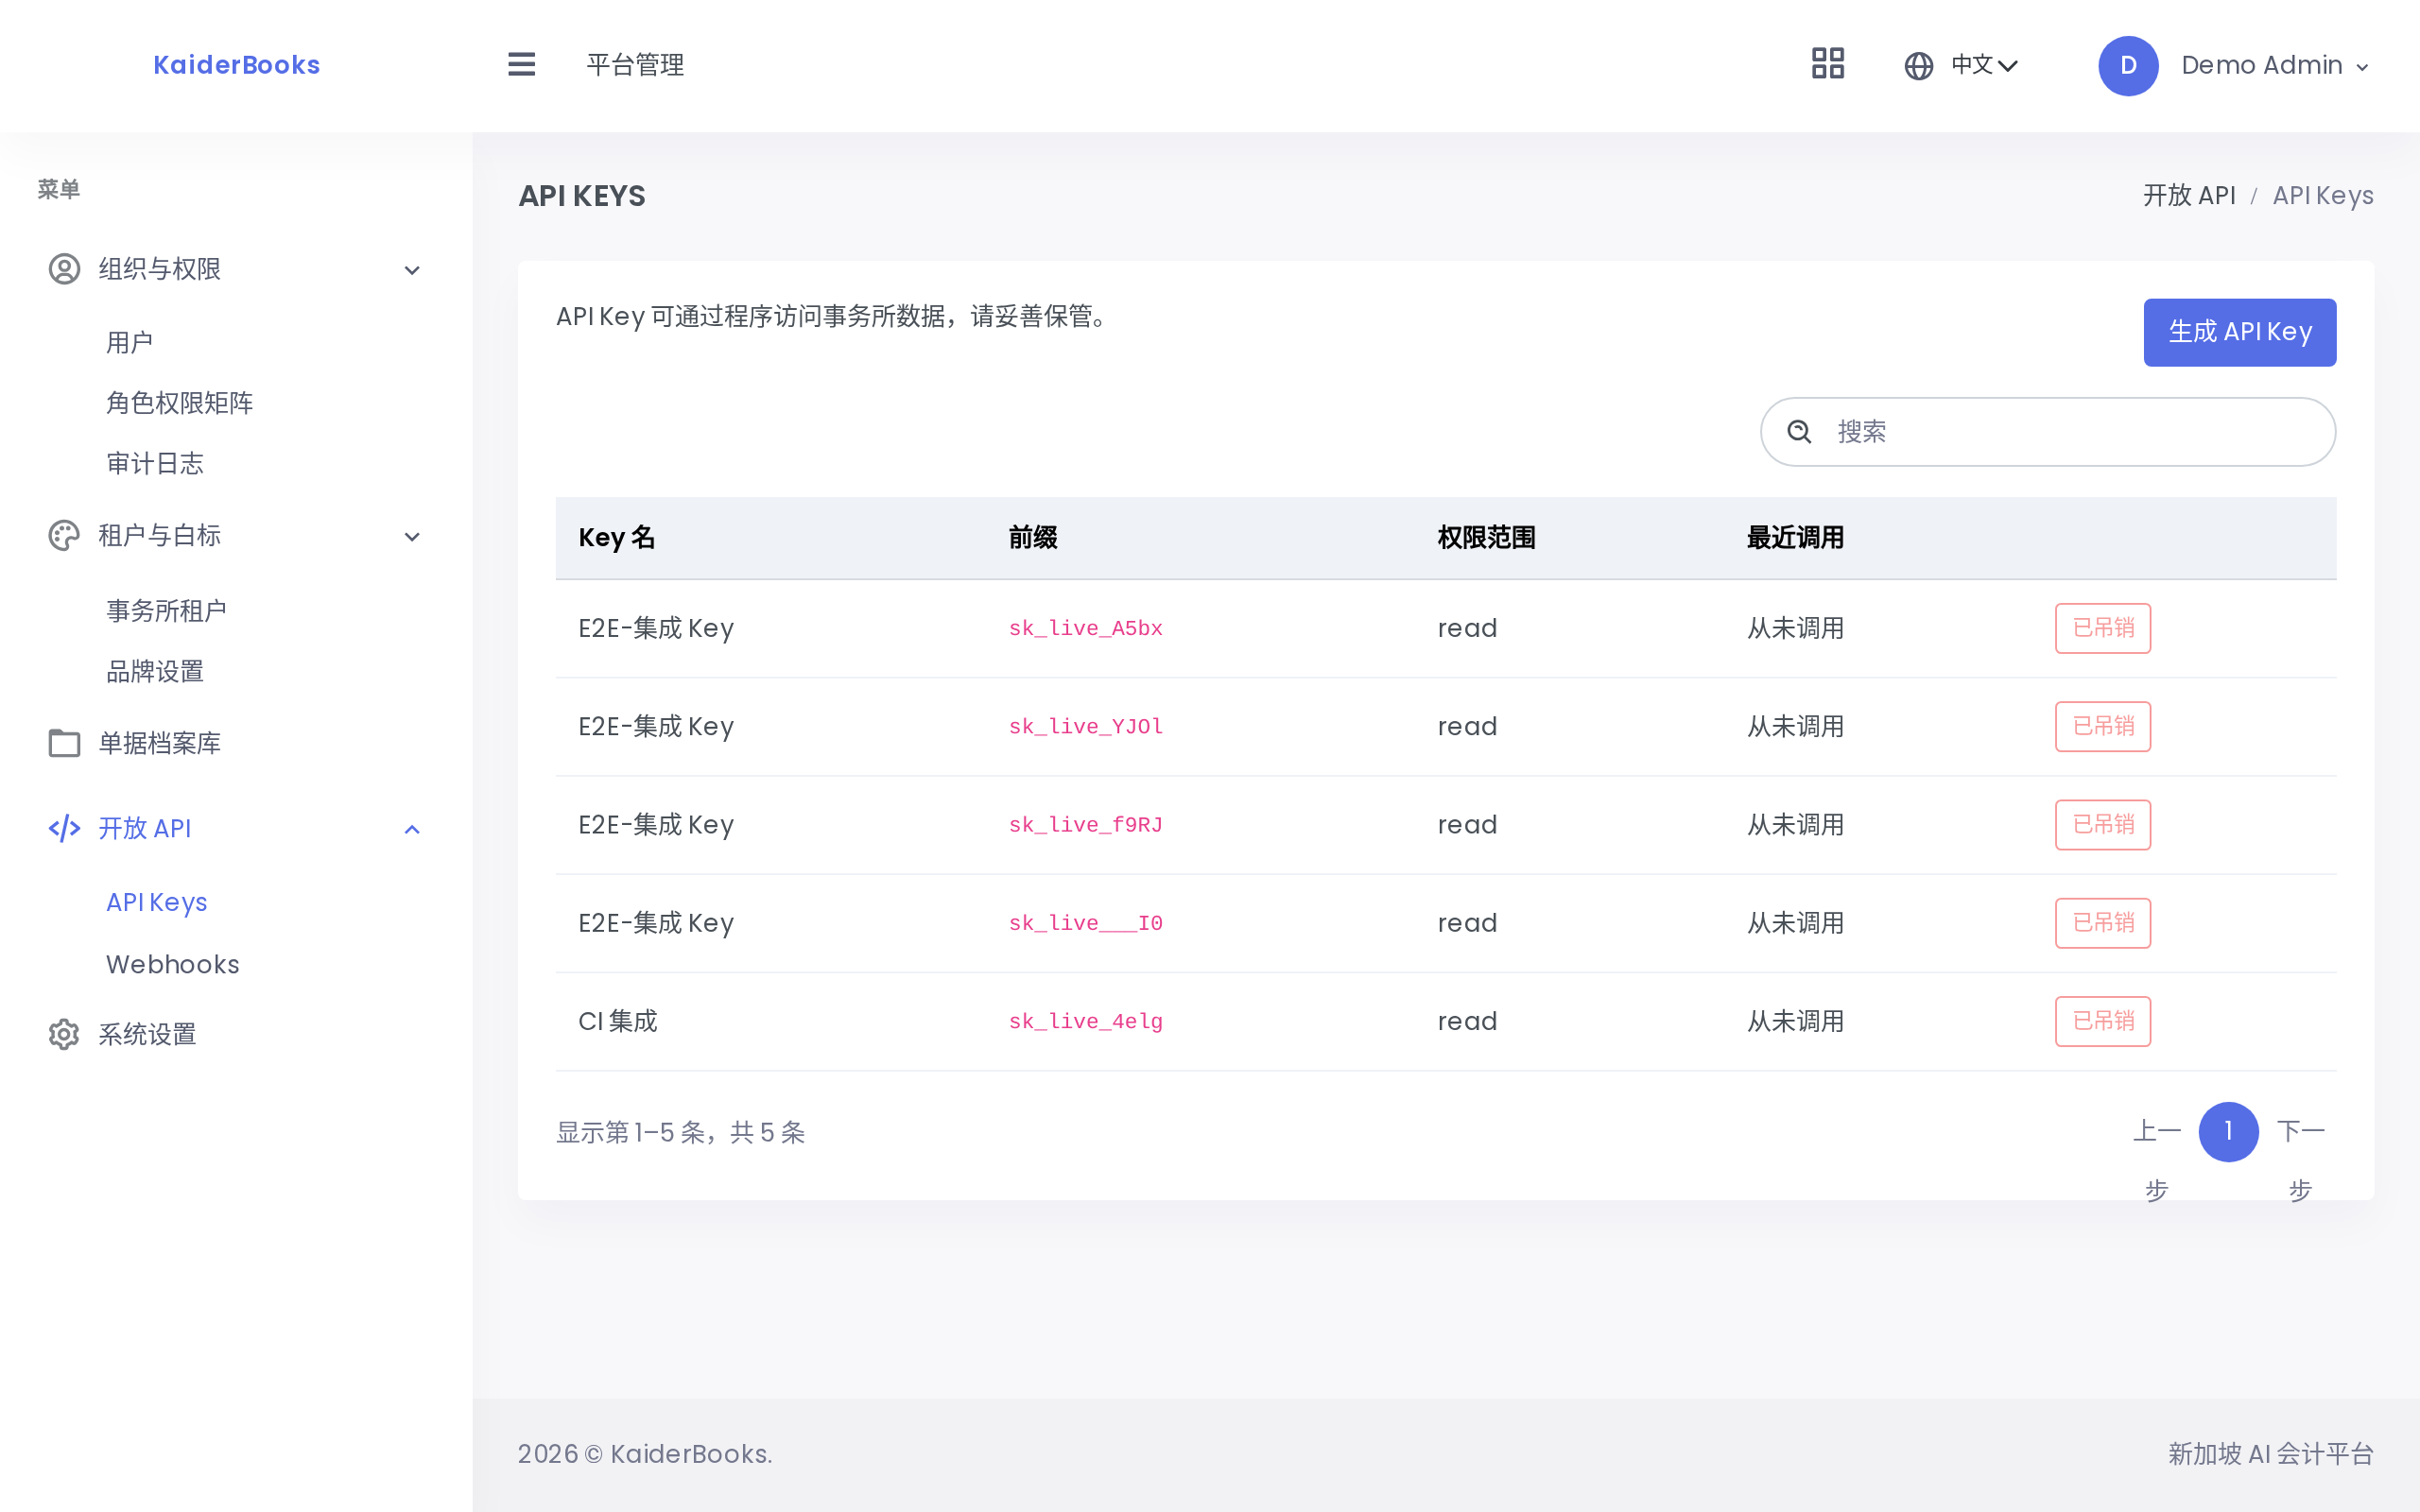
For integrating external systems. When generating a key, give it a name and tick its scopes (read / write / submit filings).
The full key is shown once
The complete key in the dialog disappears when you close it — from then on the list shows only its prefix. Copy it there and then, into whatever secret store your team uses.
Revoke takes effect immediately, with no confirmation. Every request made with that key is refused afterwards.
Webhooks
Events in the system can be pushed to an address you nominate. Supply a URL plus the events you subscribe to (comma-separated, invoice.sent by default).
| Action | Notes |
|---|---|
| Test delivery | Sends a test request now and shows the status your endpoint returned |
| Disable / Enable | Switch it off temporarily without losing the configuration |
| Delete | No confirmation — one click and it is gone |
After adding a webhook, run Test delivery once and confirm your endpoint received it before relying on it.
Audit log
Who changed what, and when. Filter by user, action or entity, or search the full text.
When a reconciliation or a figure will not agree, this is the first place to look — it records what was actually done and is unaffected by later edits.
4. Firm settings and white-labelling
Firm settings: firm name, UEN, financial year-end month, GST cycle (monthly or quarterly), plus three notification toggles — filing deadlines, AI review exceptions, and webhook failures.
White-labelling: create additional firm tenants (which also issue a one-time initial password, exactly as user invitations do), upload a logo, pick a primary colour, and bind your own domain to deliver the system under your own brand.
Next: The client portal →